 piping shot by lens envy
Cooks make pastry bags look awfully easy to use, don't they? Cupping giant bags in rounded palms, slapping used bags on the countertop, squeezing miniscule quantities of sauce down the skinny tube...it can't be that hard, right?
It's a lot harder than it looks. Sure, anyone can use a pastry bag. There are lots of little tips you can learn to avoid mistakes...and if you're wondering what could possibly go wrong you've certainly never cut a hole too large, causing the tip of your bag to shoot off across the room, and your sauce/frosting/etc to spill all over the table. Or squeezed a bag too hard, causing it to burst (see above). Or tried to warm an emulsion on top of the oven and broken it (thereby ruining your product).
First off: why use a pastry bag at all? They're impossible to clean if you use cloth ones, and if you're using plastic, you're wasteful.
Any delicate, ethereal macaron you've ever eaten? Piped with a piping bag, and almost always filled with one as well. The prettiest cupcakes and wedding cakes? Ditto. Meringue for lemon meringue pie, or baked alaska? Sometimes. Likewise for hors d'oevres, canapes, and other party snacks.
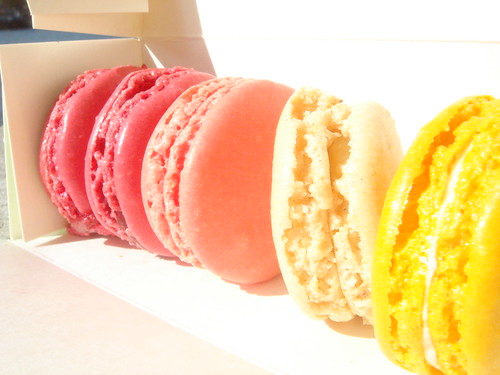 macaron by acme
If finesse is required, a pastry bag comes in handy. It's classy. Though it sometimes looks retro-chic, yes.
So, should you find yourself in need of a pastry bag, here are some tips:
1. Don't buy a Wilton's one, or whatever brand you find in your supermarket cake-decorating aisle, especially if it's got some sort of plastic screw tip. This will almost certainly fall apart.
2. Less is sometimes more: when you're filling your pastry bag you have a choice between a less-full bag that's easier to handle, and a chock-full bag that you won't have to refill often (if ever). I'm partial to a less-full bag because not only is it easier to control your piping, it's less likely to make your hands cramp up/give you repetitive stress injuries.
3. If you do go for a bag bag, keep your non-dominant hand at the top of the bag, twisting the bag shut. Squeeze the bag 3-4 inches above the tip with your dominant hand. You're turning the unwieldy cone into something manageable; by only working with a small amount of product, you are allowing yourself to have control over how much you release and where. If you've got something that's stiff, like cream cheese frosting or not-quite-tempered ganache, this is almost a necessity. When you run out of product in your zone, squeeze it down. If you've got a big bag of whipped cream, sure, top-down is fine...there's no resistance.
4. Remember, your hands are warm. The heat of your hands will warm up whatever product is in the bag. If it's ganache, be careful it doesn't overheat and separate. If it's ice cream, work fast and make sure you are piping into frozen molds. If you're finished with a product but might need it again, chill/freeze it if necessary.
5. For best piping, even pressure is key. Slow, even movements will get you the best results. If you're nervous, practice on parchment, the counter, or whatever's nearby.
6. In a pinch, you can make a pastry bag out of a ziplock. Fill the bag, pinch shut, turn 45 degrees so bottom edge is pointing directly at floor, then cut a hole.
7. Re: cutting holes: err on the side of smaller rather than larger, and hold the bag upright with one hand and cut with the other to avoid a mess. You can lay it on the table, but it might squirt out.
I personally think my tips are way better than these tips. If you need guidance on filling the pastry bag, go here.
If you need a really small amount of something (chocolate or frosting for writing on a cake) you can make a cornet...also known as "a small cone of parchment paper." But that's a lesson for another day.
.jpg)


No comments:
Post a Comment